How to Take Screenshots in Windows 10! There are good reasons why we need to take Screenshots in Windows 10. We can take Screenshots for many causes. A screenshot can be useful for quickly showing your desktop what’s are you doing. Or you can take a Screenshot a quick moment from a video that you need to share with someone. So it is a very important thing to take a Screenshot. Because we need to take Screenshot to show something which is a very important thing for me.
Windows 10’s built-in screenshot controls which is very easy to use. And it is very useful for every people who use windows 10. Because screenshot is a thing which helps us to take a capture on Desktop what we are doing. So it is a very important thing for everyone.
There are many ways to take Screenshots in Windows 10. We can take Screenshots using many others software, but Windows 10 has this feature as default. So here I will show you “How to take Screenshot in Windows 10” So let’s start our today’s topics.
Take a Screenshot in Windows 10:
Here I will show 3 alternative ways to take a screenshot in Windows 10.
Method 1: Print Screen
It is old screenshot standard still exists in Windows 10. You will find “Prt Scn” key it in your keyboard. When you will click this button that’s moment instant desktop will capture as a photo and it will be copied to the clipboard. From there you can paste it into Print, MS Word, GIMP, Photoshop, or any other photo program that allows you to paste in an image and it will be able to paste to there.
Method 2: PrtScn + Windows key
PrtScn is available since Windows 8. You can use “Windows key + PrtScn key” to take a screenshot easily. It will capture instant desktop when you will press “Windows key + PrtScn key“. Open File Explorer, navigate to Pictures > Screenshots. Here you will find your all screenshot. To take current window Screenshots such as Chrome, Word, Excel, or PowerPoint—tap “Alt + PrtScn“. It will copy an image of the window currently in focus to the system clipboard.
Method 3: Snipping Tools
Snapping Tools? It is installed default on windows all of the versions. You will be able to take capture a custom chunk of the screen, then mark up and save it in your own directory.
- To get started click “
Start Menu“ - And type “
snip“ - Then you will found the snipping tool.

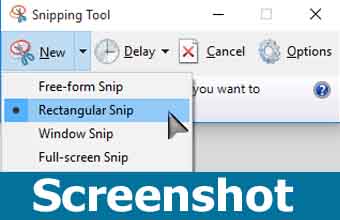
- Next, click the new drop-down and select the desired shape which you want. Here you will be able to take screenshots easily and also will be able to edit.
That was our today’s topic “How to take Screenshot in Windows 10”. Here we are show 3 alternative methods to take a screenshot in windows 10 easy way. Now at this moment, I would like to conclude here are today’s topics “How to take Screenshot in Windows 10”. We always try to make a tutorial easy. So that everyone can understand easily.


